Sunday 8 January 2023

first time out with spintronics


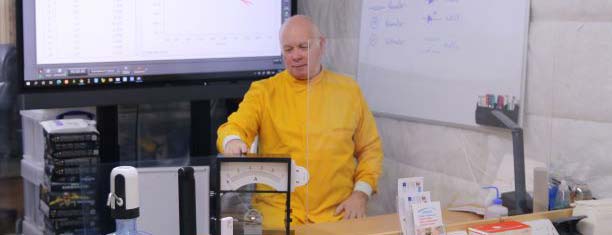
 First time out with @upperstory spintronics and @matrixtsl Locktronics explaining the flow of electrons around a circuit The students seemed to get the idea better than without the spintronics. 

Lesson Plan

  1. Begin by introducing the concept of electricity and its importance in our daily lives.
  2. Define the terms 'circuit' and 'flow of electricity.' A circuit is a path that electricity flows through, and the flow of electricity is the movement of electrons through a conductor.
  3. Next, explain the three basic parts of a circuit: a power source, a conductor, and a load. The power source provides the electricity, the conductor carries the electricity from the power source to the load, and the load is a device that uses the electricity, such as a light bulb.
  4. Discuss the concept of electrical resistance. Resistance is a measure of how difficult electricity can flow through a material. Materials with low resistance, such as copper, allow electricity to flow easily, while materials with high resistance, such as rubber, block the flow of electricity.
  5. Introduce the concept of a circuit diagram, which is a graphical representation of a circuit. Circuit diagrams use symbols to represent the different parts of a circuit, such as a battery for the power source and a light bulb for the load. List some items.
  6. What goes around the circuit - what is electricity - the flow of electrons. Watch the chain of the spintronics with the blue link and an indicator.
  7. Have students create their own simple circuit diagrams using provided materials, such as batteries, light bulbs, and wires.
  8. Compare adding another resistor to spintronics
  9. Have students build the circuits represented in their circuit diagrams and observe the flow of electricity through the circuit.
  10. Conclude the lesson by reviewing the key concepts and having students summarize the flow of electricity around a circuit.

Friday 6 January 2023

Phonograph strip


 This is a phonograph strip. When you press your thumbnail to the ridges and pull, the thumbnail vibrates, and you can hear the message that was recorded on the strip.

Thursday 5 January 2023

Ballistic Cart Accessory


 Using a @pascoscientific ballistic cart accessory to show that the ball will go back into the cart if the cart is moving at a constant velocity. A lot of fun doing this in class.


If a ball is fired vertically while the cart is moving at a constant velocity, the ball will follow a parabolic trajectory due to the combined effects of gravity and the cart's motion. The path of the ball will be affected by the initial speed at which it was fired, as well as the acceleration due to gravity and the velocity of the cart.

If the ball is fired with a high enough initial speed, it may reach a height greater than the cart's height. In this case, the ball will follow a parabolic trajectory that takes it above the cart, and it will eventually fall back down to the cart due to the force of gravity. If the ball is fired with a lower initial speed, it may not be able to reach a height greater than the cart, and it may simply follow a curved path back into the cart.

It's also worth noting that if the cart is moving at a constant velocity, the ball will experience a constant horizontal acceleration due to the motion of the cart. This means that the ball will constantly accelerate horizontally while in the air, which can affect the shape of its trajectory.

Wednesday 4 January 2023

Planning a Maths Answer


I can't do it - I don't know where to start - It's too hard. Making a plan to solve the problem is the best solution. Giving the students tens of problems to solve but just getting them to plan how they would answer the problem seems to be working.
Here are some general techniques for solving math problems:

Read the problem carefully and ensure you understand what you are being asked to do. Try rephrasing the problem in your own words.

Identify the given information and the unknown quantity that you need to find.

Determine a plan of action. What operations do you need to perform to solve the problem?

Carry out your plan and solve the problem.

Check your work to make sure that your solution is reasonable and correct.

Read the problem carefully and ensure you understand what you are being asked to do. Try rephrasing the problem in your own words, breaking it down into smaller pieces or asking for help from a fellow student, teacher, or tutor.

Tuesday 3 January 2023

Le Chatelier's principle Lesson Plan


 Le Chatelier's principle is a principle in chemistry and physics that helps to predict the effect of a change in conditions on a chemical or physical system that is in equilibrium. The principle is named after the French chemist Henry Louis Le Chatelier, who formulated it in the late 19th century. It states that if a system that is in equilibrium is subjected to a change in one of its variables (such as temperature, pressure, or concentration), the system will shift in a way that tends to counteract the effect of the change in an attempt to restore equilibrium. This principle can be used to understand and predict the behaviour of a wide range of chemical and physical systems, including reactions in chemical systems, phase transitions in materials, and even the behaviour of gases in containers.

Demo Pressure in Co2 in water changing using @PascoScientific Pressure Sensor

  1. Introduction: Begin by explaining that Le Chatelier's principle is a useful tool for understanding and predicting the behaviour of chemical and physical systems that are in equilibrium.

  2. Definition and explanation: Define Le Chatelier's principle and explain how it works. Use examples to help students understand the concept.

  3. Practice: Have students work through a series of problems that require them to apply Le Chatelier's principle. For example, they might be asked to predict the effect of a change in temperature on a chemical reaction that is in equilibrium. Such an experiment is the change in colour of Cobalt Chloride in acid in both hot and cold water and demonstrates the change in colour.


  1. Group activity: Divide the class into small groups and have each group choose a real-world scenario (such as the dissolution of salt in water or the dissociation of hydrogen and oxygen gases) and use Le Chatelier's principle to predict the effect of a change in one of the variables on the system.

  2. Discussion: Have the groups present their findings to the class and discuss any differences or similarities between the scenarios.

  3. Review and assessment: Review the key points of Le Chatelier's principle and have students complete a quiz or test to assess their understanding of the concept.

  4. Extension: If time allows, have students research and report on a real-world application of Le Chatelier's principle, such as its use in the petroleum industry or in the design of chemical plants.


Le Chatelier's principle helps to predict the effect of a change in conditions on a chemical or physical system that is in equilibrium. Using the

Monday 2 January 2023

Hans Geiger and Ernest Marsden Scattering Experiment


 Hans Geiger and Ernest Marsden were two of the pioneers in the field of atomic physics. Their work on the scattering of alpha particles by a thin gold foil, which was conducted in 1909 under the supervision of physicist Ernest Rutherford, played a crucial role in the development of the modern theory of the structure of the atom.

Geiger and Marsden's experiment involved shooting a beam of alpha particles (positively charged particles consisting of two protons and two neutrons) at a thin gold foil. They expected the alpha particles to pass straight through the foil, but to their surprise, some of the particles were scattered at large angles. This result indicated that there must be a dense, positively charged nucleus at the centre of the atom, surrounded by electrons.

Lord Ernest Rutherford used these results to develop his famous model of the atom, in which the nucleus is depicted as a small, dense, positively charged core surrounded by a cloud of electrons. This model, which is now known as the Rutherford Nuclear model, was a major advancement in our understanding of the structure of matter and laid the foundation for much of the research in atomic physics that has taken place since.

Youngs Modulus


 One of the hardest parts of working out Youngs Modulus is working out how to read a vernier scale correctly. Needed for the thickness of the wires and the change in length.

Objective:

  • To measure the Young's modulus of a piece of wire using a tensile test.

Materials:

  • Piece of wire
  • Tensile testing machine
  • Ruler or caliper for measuring the length and diameter of the wire
  • Graph paper

Procedure:

  1. Cut a piece of wire to a specific length (e.g., 20 cm) and measure its diameter using a ruler or caliper. Record the length and diameter in a data table.

  2. Attach the wire to the tensile testing machine and set it to apply a tensile force at a constant rate.

  3. Measure the deformation (e.g., elongation) of the wire as the tensile force is applied. Record the stress (i.e., the applied force divided by the initial cross-sectional area of the wire) and strain (i.e., the deformation divided by the initial length of the wire) in the data table.

  4. Repeat the tensile test at least three times with different loads (e.g., 50 N, 100 N, 150 N).

  5. Plot the stress versus strain on a graph using graph paper.

  6. Determine the slope of the linear portion of the curve, which is the Young's modulus of the wire.

  7. Calculate the average Young's modulus of the wire based on the results of the multiple tests.

Discussion:

  • Discuss the importance of Young's modulus in engineering applications.
  • Compare the Young's modulus of the wire with that of other materials (e.g., steel, aluminum, wood).
  • Discuss factors that may affect the Young's modulus of a material, such as temperature and humidity.

Assessment:

  • Have students write a lab report summarizing the procedure, results, and discussion of the experiment.
  • Have students present their findings in a class discussion or presentation.
  • Have students answer questions about the experiment and the concept of Young's modulus in a quiz or exam.

  • Young's modulus, also known as the elastic modulus, is a measure of the stiffness of a solid material. It is defined as the ratio of the applied stress to the corresponding strain in the material. Young's modulus is a measure of the stiffness of an object, and is calculated by dividing the applied stress by the resulting strain. It is typically measured in units of pascals (Pa) or gigapascals (GPa). The higher the Young's modulus, the stiffer the material is. Some common materials and their Young's moduli are:

    • Steel: 200 GPa
    • Aluminum: 70 GPa
    • Concrete: 25 GPa
    • Wood: 12 GPa
    • Rubber: 0.01 GPa

A level Math

  Students working out just what formulae are and are not in the exam sheet. Then, the panic can begin to memorise the formulae that are not...